

Managing Certificates
The Operator expects consumers to leverage a third-party tool to generate TLS certificates that can be wired in to KurrentDB deployments using secrets. The sections below describe how certificates can be generated using popular vendors.
Picking certificate names
Each node in each KurrentDB cluster you create will advertise a fully-qualified domain name (FQDN). Clients will expect those advertised names to match the names you configure on your TLS certificates. You will need to understand how the FQDN is calculated for each node in order to request a TLS certificate that is valid for each node of your KurrentDB cluster.
By default, the network.fqdnTemplate field of your KurrentDB spec is {podName}.{name}{nodeTypeSuffix}.{domain}, which may require multiple wildcard names on your certificate, like both *.myName.myDomain.com and *.myName-replica.myDomain.com. You may prefer to instead configure an fqdnTemplate like {podName}.{domain}, which could be covered by a single wildcard: *.myDomain.com.
Certificate Manager (cert-manager)
Prerequisites
Before following the instructions in this section, these requirements should be met:
- cert-manager is installed
- You have the required permissions to create/manage new resources on the Kubernetes cluster
- The following CLI tools are installed and configured to interact with your Kubernetes cluster. This means the tool must be accessible from your shell's
$PATH, and your$KUBECONFIGenvironment variable must point to the correct Kubernetes configuration file:
Using trusted certificates via LetsEncrypt
To use LetsEncrypt certificates with KurrentDB, follow these steps:
- Create a LetsEncrypt Issuer
- Future certificates should be created using the
letsencryptissuer
LetsEncrypt Issuer
The following example shows how a LetsEncrypt issuer can be deployed that leverages AWS Route53:
apiVersion: cert-manager.io/v1
kind: ClusterIssuer
metadata:
  name: letsencrypt
spec:
  acme:
    privateKeySecretRef:
      name: letsencrypt-issuer-key
    email: { email }
    preferredChain: ""
    server: https://acme-v02.api.letsencrypt.org/directory
    solvers:
      - dns01:
          route53:
            region: { region }
            hostedZoneID: { hostedZoneId }
            accessKeyID: { accessKeyId }
            secretAccessKeySecretRef:
              name: aws-route53-credentials
              key: secretAccessKey
        selector:
          dnsZones:
            - { domain }
            - "*.{ domain }"
This can be deployed using the following steps:
- Replace the variables
{...}with the appropriate values - Copy the YAML snippet above to a file called
issuer.yaml - Run the following command:
kubectl apply -f issuer.yamlUsing Self-Signed certificates
To use self-signed certificates with KurrentDB, follow these steps:
- Create a Self-Signed Issuer
- Create a Self-Signed Certificate Authority
- Create a Self-Signed Certificate Authority Issuer
- Future certificates should be created using the
ca-issuerissuer
Self-Signed Issuer
The following example shows how a self-signed issuer can be deployed:
apiVersion: cert-manager.io/v1
kind: ClusterIssuer
metadata:
  name: selfsigned-issuer
spec:
  selfSigned: {}
This can be deployed using the following steps:
- Copy the YAML snippet above to a file called
issuer.yaml - Run the following command:
kubectl apply -f issuer.yamlSelf-Signed Certificate Authority
The following example shows how a self-signed certificate authority can be generated once a self-signed issuer has been deployed:
apiVersion: cert-manager.io/v1
kind: Certificate
metadata:
  name: selfsigned-ca
  namespace: kurrent
spec:
  isCA: true
  commonName: ca
  subject:
    organizations:
      - Kurrent
    organizationalUnits:
      - Cloud
  secretName: ca-tls
  privateKey:
    algorithm: RSA
    encoding: PKCS1
    size: 2048
  issuerRef:
    name: selfsigned-issuer
    kind: ClusterIssuer
    group: cert-manager.io
Note
The values for subject should be changed to reflect what you require.
This can be deployed using the following steps:
- Copy the YAML snippet above to a file called
ca.yaml - Ensure that the
kurrentnamespace has been created - Run the following command:
kubectl apply -f ca.yamlSelf-Signed Certificate Authority Issuer
The following example shows how a self-signed certificate authority issuer can be generated once a CA certificate has been created:
apiVersion: cert-manager.io/v1
kind: Issuer
metadata:
  name: ca-issuer
  namespace: kurrent
spec:
  ca:
    secretName: ca-tls
This can be deployed using the following steps:
- Copy the YAML snippet above to a file called
ca-issuer.yaml - Ensure that the
kurrentnamespace has been created - Run the following command:
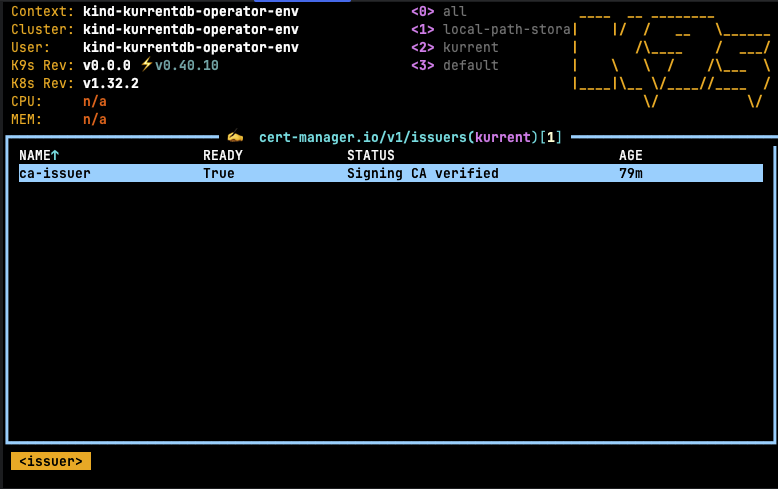
kubectl apply -f ca-issuer.yamlOnce this step is complete, future certificates can be generated using the self-signed certificate authority. Using k9s, the following issuers should be visible in the kurrent namespace:
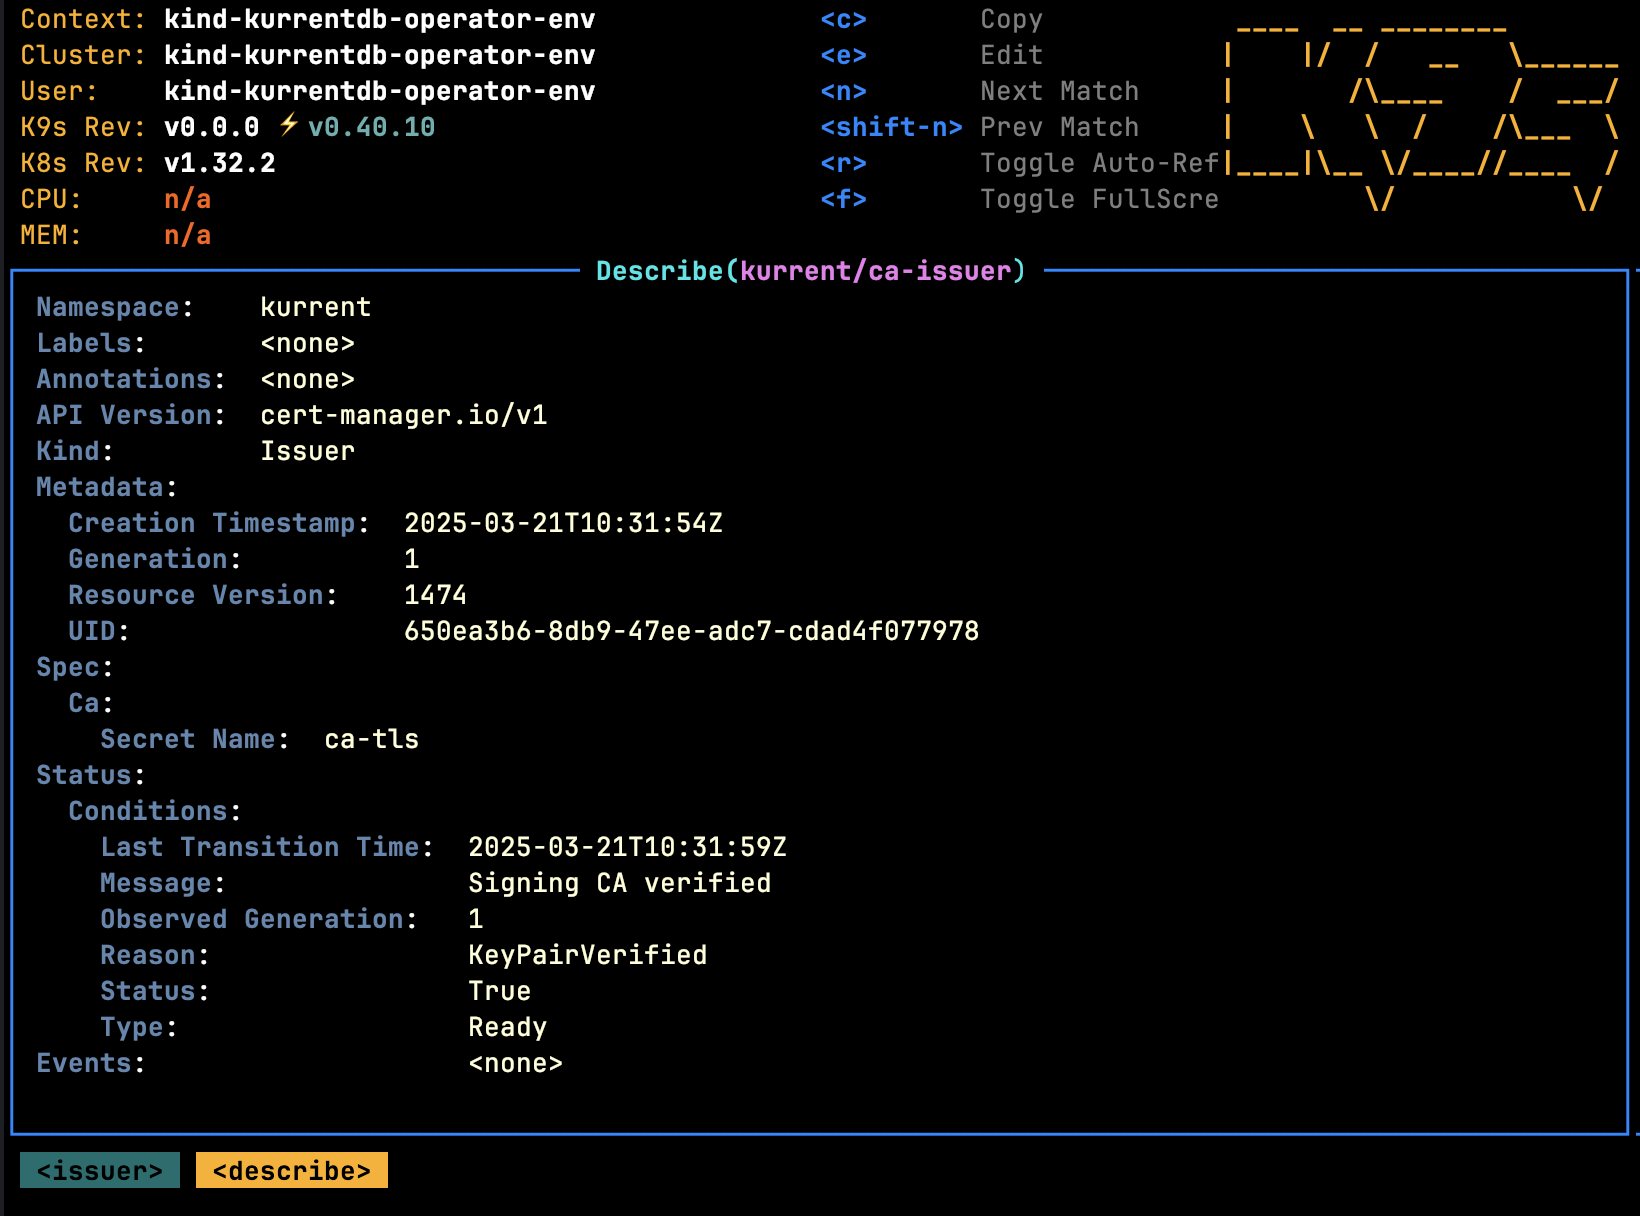
Describing the issuer should yield:
Migrating Certificate Authorities
If for some reason you need to migrate Certificate Authorities (for example, switching from one self-signed CA to another), the process follows three steps:
Update your
KurrentDB.spec.security.certificateAuthoritySecret:- First, ensure the named Secret contains only CAs; the database will not start if you have your TLS keys or other contents in the same Secret.
- Add your new CA as a new key to the Secret, leaving the old CA in place.
- Remove the
.keyNamefield to indicate you want all keys of the Secret mounted into database pods as trusted CAs. - Wait for the KurrentDB resource to return to the
database-healthystate. - Handle possible race condition; see below.
Update your
KurrentDB.spec.security.certificateSecret:- Switch to the TLS keypair signed by the new CA. You may either configure your KurrentDB to reference a new Secret (which will cause a rolling restart) or update the content of the currently-referenced Secret (which will cause a config reload, no node downtime).
- Wait for the KurrentDB resource to return to the
database-healthystate.
Update your
KurrentDB.spec.security.certificateAuthoritySecretagain:- Remove the old CA you no longer wish to trust.
- Restore the
.keyNameif desired. - Wait for the KurrentDB resource to return to the
database-healthystate.
During step 1, the Operator requests the mounted pod secrets to be resynced, then waits 10 seconds, then requests the database pods to reload their configs (including trusted CA list). If the kubelet is under very heavy load, it may not have actually synced the secrets into the pods by the time the database reloads. For TLS key pair changes, the Operator can detect and remediate that race condition. However, with CA list changes, the Operator cannot tell if the race occurred. The race condition is rare, however, if it occurs and it is unaddressed, then step 2 will result in a full restart, which is unnecessary downtime.
To guarantee no unnecessary downtime, you may take one of the following actions:
You can exec into the pods, confirm that your updates appear in
/kurrentdb/cadirectory (or/eventstore/cafor older database versions), then trigger another config reload by bumping the.spec.configReloadKeystring to any new value.You can simply wait a few minutes then bump the
.spec.configReloadKey. How long you need to wait is governed by the kubelet'ssyncFrequencyandconfigMapAndSecretChangeDetectionStrategystrategy. For default kubelet settings, you need to wait at least one minute.If you have multiple nodes, you may issue an immediate rolling restart by bumping the
.spec.rollingRestartKeystring to any new value. When nodes restart they are guaranteed to mount the latest secrets.